Showing posts with label new loves. Show all posts

Friday, 2 September 2011

Silver Clay Jewellery - Learning Something New

Last week I took a silver clay jewellery course. It was something I've wanted to try and have never done before so it seems the perfect opportunity to link to The Crafters Apprentice's Learn a New Technique (LANT) Challenge. For those of you who don't know Wendy has challenged her fellow crafters to try out new crafts they've never done before and then write about what they have learnt. If you need any ideas for crafts to try then Wendy has compiled a huge list of ideas for you!


The course I took was a four day intensive course to teach how to work with metal clay with the aim of coming away having made at least one piece of jewellery each day. There are various different types of precious metal clays but we just used silver. The silver clay is a combination of water, binders and very fine particles of silver. This can be moulded into whatever shape is required and then fired. When it is fired the binders burn away and you are left with a solid piece of metal that is 99.9% pure silver. The first time you see this happen it seems like magic! Or alchemy! I wish I had taken more pictures of the whole process but I was enjoying myself so much I forgot.

We were given three sorts of silver clay to work with - packets of silver clay (similar to polymer clay or fimo), a little bottle of silver clay paste which could be painted onto things with a brush and a syringe preloaded with silver clay for piping.

The first thing we made was a pendant with the metal clay. After playing around with polymer clay to work out a design it was time to use the real thing! We only had 7g packets to work with and the metal clay is quite expensive so it is important not to waste anything. The clay itself is funny stuff - very sticky so you have to constantly put olive oil on your fingers to stop it sticking to you and it dries out very quickly so it is best to work fast. The best thing about the silver clay is that until it has been fired you can keep reworking it - if you make something and you don't like it you can add some water to it, work it for a bit and it becomes clay again. This is excellent for people like me who have a tendency to make lots of mistakes!

This is the first pendant I made:


The texture was added using a rubber stamp with the texture imprinted on it and the circle was cut using a small cookie cutter. It was curved slightly over a domed mould to give it that convex shape and a clay bail was stuck to the back. After the clay was dry we fired it with a small creme brulee torch. It was then polished and stained using liver of sulphur to give the darker look in the crevices.

After that I was away. The next thing we made was a ring, this was using another 7g packet of metal clay and I decided to use a small stone in mine. It is a cubic zirconia - apparently you have to be careful about which stones to use as not all of them can withstand the heat, diamonds are fine but a little pricey for my second piece!! This is it:

Making a ring is a little tricky because you have to allow for the 10% shrinkage of the metal clay when it is fired. Even though I did this you can see that this ring is a little bit small which is a shame. Although I think it will fit in winter when it is a little colder and my fingers are less swollen!

The next thing we made were 3D "cage" pendants which was brilliant. And I actually remembered to take a few step by step pictures of this one so here is what we did:

Step 1: We made the shape of the pendant in cork clay. I chose a teardrop shape for mine and hid a little cubic zirconia crystal in my cork clay so that it would be in the middle of my pendant. We added a fine silver loop to the top (this is where the pendant will hang from). The cork clay was thoroughly dried and then sanded down to ensure it is exactly the right shape. I ended up with this:

Step 2: Using the syringe loaded with metal clay we piped a pattern all over the cork clay. We made sure we paid special attention to the top loop to ensure it was secure and that the loops of metal clay overlapped and were close together so there would be no holes where the crystal could fall out. At this stage it looked like this:

Step 3: We let the clay dry thoroughly (it has to be completely dry before it is fired). We did this using a hairdryer and a hotplate. After that the pendant is fired in a kiln. During firing the cork clay is burned away and you are left with a hollow shape. When it first comes out of the kiln the silver looks white but after some polishing, ta-dah:

It is difficult to see from the picture but the crystal that I put inside the cork clay is still inside the pendant and gives it a bit of sparkle as it catches the light as well as making a cute little tinkling sound. I really love this piece.

Phew! This post it getting a bit long - not long to go now I promise!

The last day of the course we were told to bring in a leaf to use to make a pendant. We spent the morning painting this with lots of thin layers of silver clay paste, allowing it to dry thoroughly between each coat. When the paste was thick enough to make a strong pendant we fired our leaves. During the firing process the leaves burned away and we were left with something like this:

Cool, eh?

During the course there was the opportunity to buy more supplies and there was time to work on other pieces here and there. In the end I made another couple of rings and a small piece including a bit of glass to test whether this would work. Not a bad haul for four days work:

I really enjoyed this course and would definitely recommend it to anyone who was thinking about having a go at using silver clay. I was amazed by how professional looking the results were after only a few hours of practice. I am also really excited by the idea that I will be able to make things at home now with very few materials. The one downside is that the silver clay itself is quite expensive but I think this is more than offset by the lack of expensive tools needed and the speed with which you can make things.

I'm really looking forward to having a go at making more things! I know what everyone in my family is getting for Christmas this year....!

Dotty xx

PS. Sorry this is such a long post - there was just so much to say. Congratulations if you made it this far!!

Wednesday, 24 August 2011

Oooooh! Glassy!

I haven't blogged about it much before but one of my new(ish!) favourite things to do is make stained glass pieces. I've been doing classes for about a year and a half now and I love playing with all the colours and designs and coming up with a new piece.

I now have loads of glass in my flat - some leftover from other pieces and some bought because I was in the shop and saw something so beautiful I couldn't resist! (Seriously, going to a glass shop is like going to a sweet shop - there are beautiful things on every wall and you want them all!)

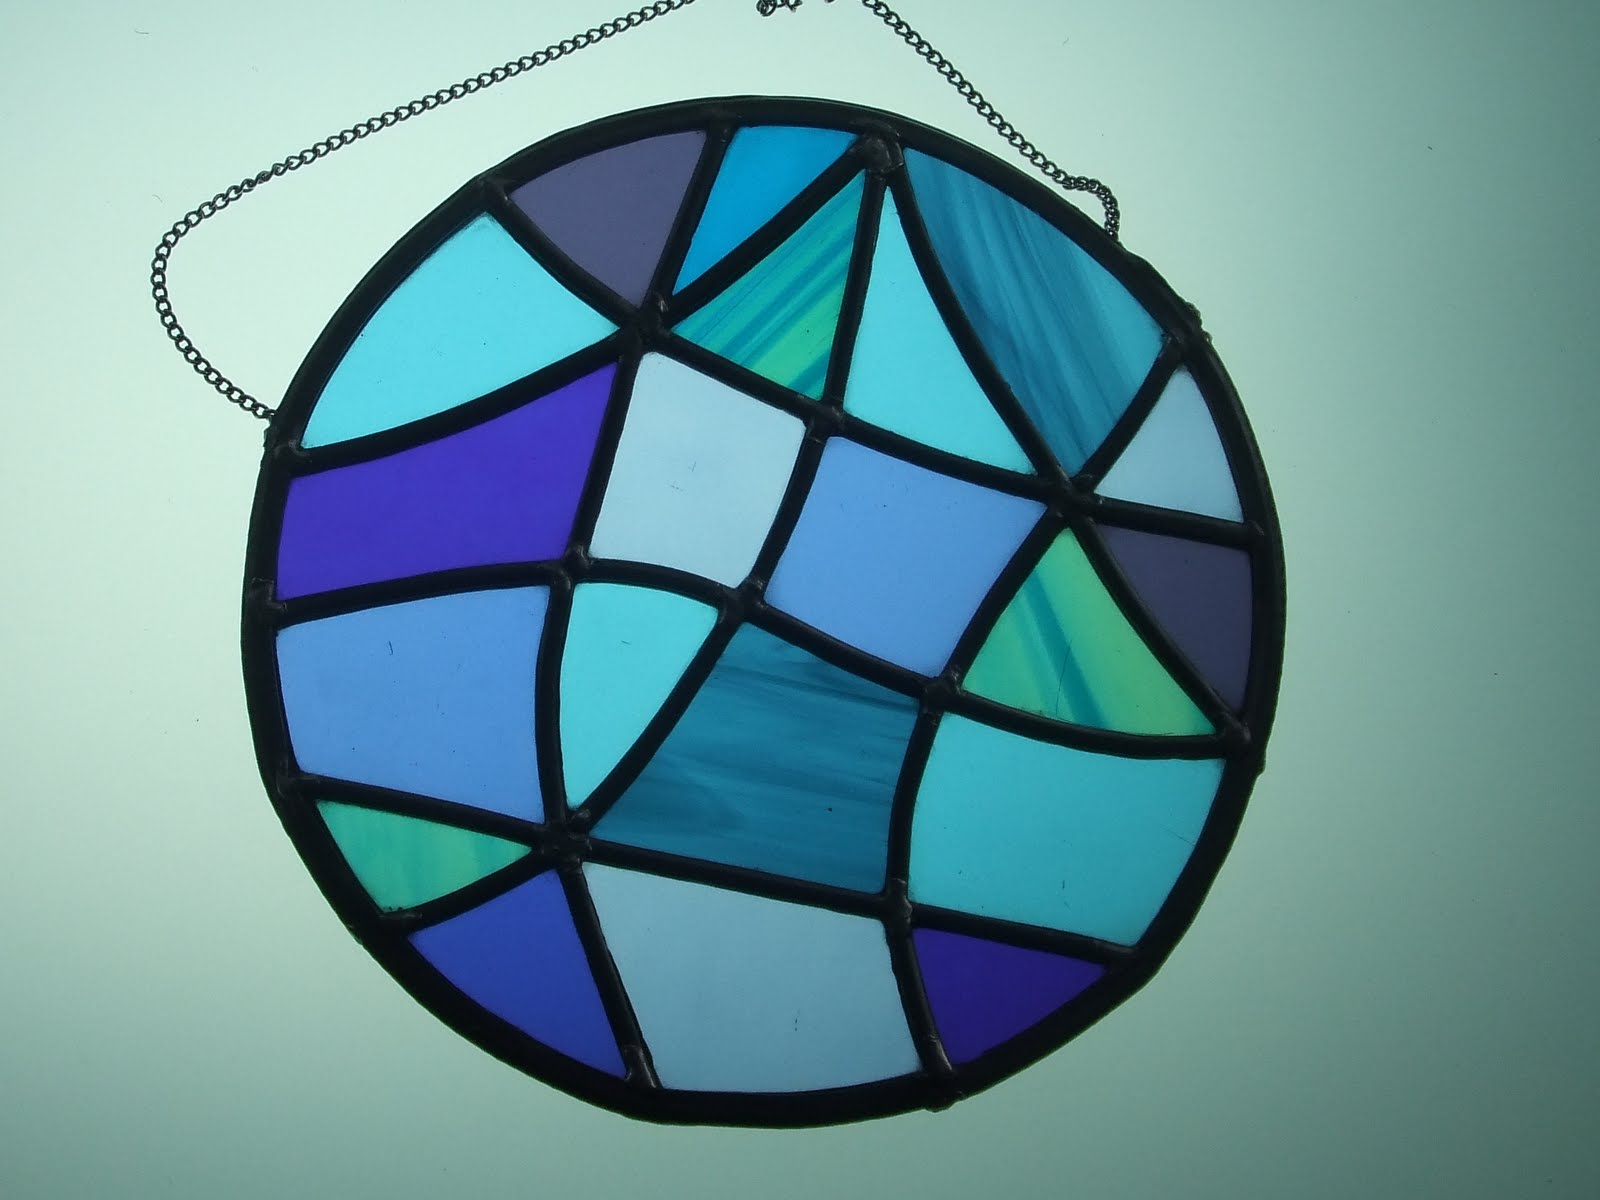
I seem to gravitate towards blue pieces and had lots in my stash so I decided to make use of all the pieces I have accumulated and design something modern and abstract using bluey greeny colours.

I also had never leaded up a circle before and its something I wanted to try so I decided to incorporate that into my design. Normally, when doing a straight edged piece, you lead into a right angle made with two blocks of wood - because you can't do this for a circle it is slightly more tricky! Unfortunately I didn't think to take any pictures whilst I was leading up - the one above is after I had leaded and soldered but before cementing and polishing.

This is the finished piece:

It has been cemented to keep the glass secure in the lead, the lead has been blackened and the whole piece has been polished to give it a shine.

I'm pretty pleased with the results, I just need to secure the ends of the chain and then it will be hung in the window as a lightcatcher. I think I am going to give this to my parents this weekend - I hope they like it! Just one more close up of those lovely blues:

I have also made another leaded circular piece of a similar size which incorporates pieces of fused glass but I will have to show you that another time. As well as finally finishing my glass pieces I've been taking a precious metal clay course this week which has been lots of fun and I'll have the results of that soon.

Happy crafting!

Dotty xx

Tuesday, 2 August 2011

New loves – Crochet

I have decided to do a series of posts on crafts I have picked up whilst I’ve been away and not blogging. I thought I’d start with crochet. I only started crocheting at the beginning of the year and I am completely hooked! (Sorry, I never get tired of that pun!)

I’ve always liked crochet but for some reason thought it was something I would never be able to do. I suppose it’s because I have always associated it with knitting and the one time I tried knitting was disastrous – I was so uncoordinated with the needles and ended up in a grumpy impatient mess!Then earlier this year I noticed that a new crafts venue near where I live was offering drop in crochet and knitting on a Wednesday. So I headed to The Create Place and Marie gave me my first ever lesson in crochet. At first I found it so hard and couldn’t find a way to hold the hook that felt natural but eventually managed a couple of rows of single crochet. I was just getting used to that when Marie suggested I try a double crochet and then once I had mastered that a triple crochet. By the time I left that morning I was grinning wildly and I was clutching a square of purple crocheted yarn that I was insanely proud of......so proud in fact that it sat on my mantelpiece for about a month!

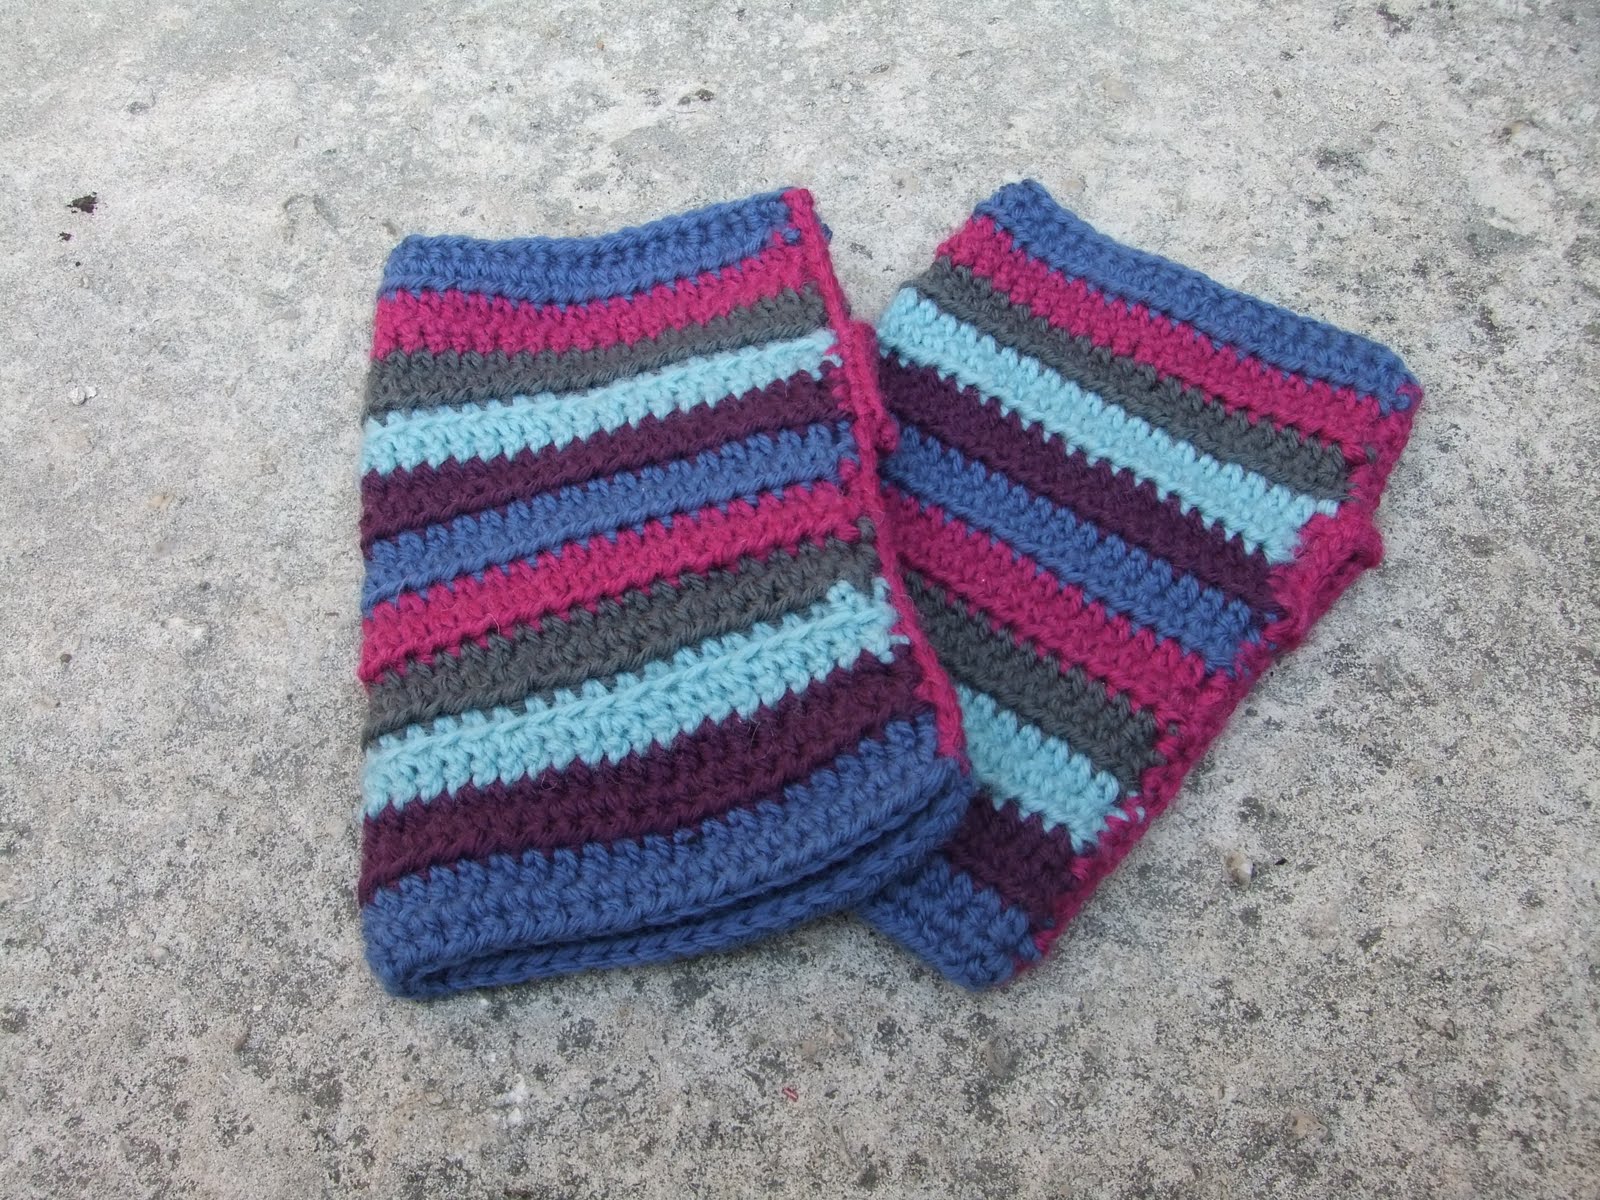
After that I was addicted – I went straight to the shops and bought some yarn and hooks and began trawling the internet for interesting (and simple projects) I could try.The first proper thing I made was the wrist warmers using the tutorial on the wonderful Attic24 blog.


These are coordinated to match a scarf I already have and were a really good beginner project. Plus they taught me a new stitch – half treble (which I call half double because I learnt the American terminology – v confusing!).


After that I was away and started work some circular cushion covers inspired by those in Cute and Easy Crochet by Nicki Trench. I couldn’t get the pattern in the book to work for me so with some more help from Marie I came up with these:

And in closeup:


At the same time as I was making the cushions I became obsessed with the idea of making some crochet bunting. There were loads of lovely bunting patterns about there (just look at this flickr gallery that Lucy from Attic24 put together) but there wasn’t anything that was exactly what I was looking for. In the end, after a lot of trial and error I came up with my own pattern and I’m really pleased with how it turned out.


I’m only giving you a sneak peak here as I was thinking I might do another post on the bunting and maybe even a tutorial if anyone is interested?

Finally, what would a crochet post be without a mention of granny squares! After a few months of crocheting I asked Marie to give me a lesson on granny squares. She showed me how to make a classic granny as well as her own pattern (similar to a sunburst pattern). I went away and this is what I came up with:


I was originally going to make them into a blanket but I decided a cushion would be better to start with! The cotton I used split really easily and it was going to be too frustrating to make the hundreds of squares I needed to make a blanket. Now I just need block these squares, attach them altogether and work out how to make a cushion cover…..that should be easy enough, right?!

I’ve actually already started on some squares for a blanket with different yarn but I think I’ve rambled on enough now so I’ll save that for another post!

Have any of you tried crochet? What patterns and crochet blogs do you like? I’m always on the lookout for new ideas!

Dotty xx
 
design by suckmylolly.com