Tuesday 20 September 2011

Patchwork Scottie Dog

Hello there! More pink patchwork today I'm afraid....!

I fell in love with this pattern for a patchwork scottie when I saw it on Denyse Schmidt's website.
The pattern is based on an old traditional pattern and it says on the website: "We're not sure where the pattern originated, but it probably appeared in a very popular women's magazine (due to the proliferation of Scotties out there), possibly around the 1940’s."

I'm actually fairly sure my Grandma helped me make one of these when I was little so seeing it was a bit of a blast from the past for me. I couldn't wait for an opportunity to try it again. I decided to make one (using my extensive stash of pink materials) for my friend's daughter's 4th birthday. Here's what I came up with:

And the other side:

Cute eh? I'm really pleased with how he turned out and don't really want to give him away! He's been sitting on the sofa for a while now and I've got used to him being there - I'm going to miss him! I'll just have to make another one for me!

If you want to check out more patchwork scotties there's even a flickr group devoted to them here.

Dotty xx

PS. This scottie and I are getting up very early (4am eeek!) tomorrow and travelling to Germany to go and visit my friend. I won't be around for a little while but look forward to catching up with all your blogs when I get back!

PPS. I know it seems like I go on holiday loads but I don't really!! Just happened to have two short trips in September!

Monday 19 September 2011

Another go at quilting

I was getting a bit fed up with sitting round the house after my accident on holiday and I didn't have any plans for the weekend so when I saw that my local craft studio was running a beginners quilting weekend course I jumped at the chance. I've made a quilt once before and although it turned out OK I made lots of little mistakes along the way and I thought it would be useful to learn properly. Plus I am slightly addicted to buying fabric and I need to start using it!

After discussing possible ideas I decided to make a simple quilt with square patchwork to make the most of all the fabric I had. I took a few pictures along the way but, as always when I get involved in something, not as many as planned. (Apologies for the photo quality - some are on my phone and it was a miserable day on Saturday).

I cut 96 six inch squares using a rotary cutter and ruler and roughly arranged them to sew together. I seem to have been drawn to pink fabric (again!) so this is going to be quite a pink quilt but I tried to balance it out a bit with some turquoise and blue patches.

After much pinning and sewing and unpicking and resewing and swearing at the sewing machine I came up with this for my quilt top:

I didn't take any pictures of the next stage which involves making the quilt sandwich with wadding and backing and then loosely tacking all the layers together. Once that was all done it was finally time to do some quilting! YAY! Unfortunately making the quilt top had taken longer than expected and by this stage it was 3pm on Sunday and I was flagging! I just had time to start quilting but would have to take it home to finish off!

My initial plan was to free motion quilt in a swirly pattern. The teacher got me started on this and I had a go. I don't know if it was because I was very tired or it just isn't my thing but I found the free motion quilting SOOOO stressful! I just couldn't get the balance between the stitch speed and the speed to move the quilt around at so I ended up with wildly differing stitch lengths! After much huffing and puffing I'm ashamed to say I decided to admit defeat and give up. I really want to learn how to quilt beautiful swirly patterns but I don't think this is the project to do it on - I think I will have to start with something smaller and less challenging initially.

By that time it was nearing the end of the class so I just had a go at quilting a couple of straight lines on my quilt and brought it home to finish off.

Unfortunately that means I now have another thing to add to my WIP list! Since I got home I've been thinking about this more and I think I might unpick the straight machine quilting I did and hand quilt this one. I really like the effect of hand quilting and it is an opportunity to try something I've not done before. Plus I like the idea of sitting with this on my lap and feeling cosy whilst I quilt on a cold Autumn evening. It also means I won't have to fork out for a walking foot for my machine! It would take a long time though.....I'll keep you updated!

Dotty xx

Friday 16 September 2011

Glass Lightcatcher - Autumn Sunset

Autumn always feels like a time of new beginnings to me - probably stemming from my school days. I am looking forward to getting back into the swing of things - going to my evening classes, cosy evenings in with some craft, getting back into a routine. I'm particularly looking forward to going back to my stained glass classes, especially as I have FINALLY put the finishing touches at the piece I finished last term. It wasn't planned that way but the deep colours feel very Autumnal to me:

This is the first piece I have made incorporating fused glass into a leaded piece. It was a really good learning experience and I am definitely going to do this again. I'm having trouble getting a decent picture which really shows the rich colours (glass is SO difficult to photograph!) so here is a picture in front of a light box:

Each element of the glass was fused before being leaded up.

The pieces making up the sunset are coloured glass (purple, pink, amber) fused on top of iridescent glass - this gives them a lovely sparkly effect that can't really be seen on the pictures. In between the two layers I have used purple and amber frit (finely ground glass) to try and give the impression of the colours blending together. I think this is the part of the design that worked least well and I would probably change it I did it again!

The green glass was fused in different ways to try and give the impression of fields and give the piece some different textures. When fusing glass you can lay it on plaster in the kiln and any texture you put into the plaster transfers to the glass - this leads to some interesting effects.

I really enjoyed making this piece and it was really good to work with fused glass and find out the different challenges of leading it up. The main difficulty is that the glass changes shape (usually expands) in the kiln and this is not completely predictable so even a perfectly cut piece of glass may not fit the design after firing. The fused glass is also thicker than the glass normally used because several layers are fused together - I bought special lead to cope with this.

I haven't decided what to do for my next stained glass piece - I'd really like to do a big window but I don't really have any space in my flat for anymore. I think I'm going to have to get a friend or member of my family to commission me!

I hope you all have a lovely weekend!

Dotty xx

PS. Thanks for the sympathetic comments about my ankle "incident". I am on the mend and starting to hobble a little faster that before!

Wednesday 14 September 2011

Holiday Pics!

I've just got back home from a few days in Northern Spain and Southern France. It was nice to get away and see the sun again. I didn't take that many pictures but I thought I'd share these few with you here, all from the Guggenheim museum in Bilbao.

We fell in love with this huge dog all covered in plants by Jeff Koons.

We weren't allowed to take pictures inside the building which was a shame although the building was amazing and a work of art in itself:

I did manage to get this snap on one of the outside balconies of another Jeff Koons piece:

which bizarrely reminded me of the colourful crochet hooks I treated myself to recently!

Unfortunately, after Bilbao, things went downhill somewhat. I stepped down from a step badly and fell, spraining both my ankles and, after an afternoon in French A&E checking they weren't broken, I spent the rest of the holiday on crutches feeling sorry for myself! Oh dear!

Unsurprisingly there aren't so many photos from that stage of the holiday! I did manage to get some work done on my granny square blanket which I will show you in a later post (the squares are still in France at the mo - I had to leave them with my parents to cut down on luggage for the flight home alone and on crutches!).

Luckily the ankles are healing pretty fast and I'm now installed on the sofa hoping to catch up on some crafting and all of your blogs!

Back soon!
Dotty xx

Sunday 4 September 2011

Packing the Essentials

I'm off on holiday for a few days tomorrow and obviously have to take some kind of portable craft project with me. I think I may have a problem - the idea of going somewhere without something to sew or crochet makes me a bit panicky!! And I actually can't even remember the last time I watched TV without something crafty in my hands! So for the last few days I have been working frantically to turn these:

into these:

I've got a few more to do tonight before I go tomorrow. I'm only taking a small hand luggage case so the idea was that if I took a load of centres I would only need to take the creamy-white yarn to do the outsides. A few balls of cream yarn and 40 centres are still taking up quite a lot of room but hey, who needs a toothbrush and suncream?!

Hopefully when I get back I'll have another 40 squares to add to my original 20. And then I can start doing some joining! I haven't decided how big I'm going to make it yet - I would like to make it huge but I seem to be already getting crochet RSI!


(The one above is my favourite square so far!)

Because of all the crocheting I haven't had much time for other crafting this week but I have managed to make a card for the family friend we are going to see in France:

Its all embroidered on card and I'm quite pleased with it but I wish I hadn't done the wording in black - it looks a bit dark to me. If I make another one I think I might try in a grey....

Hope you are all having a good weekend and have a good week - I'll hopefully be back with some pics and a case full of granny squares next weekend!

Dotty xx


Friday 2 September 2011

Silver Clay Jewellery - Learning Something New

Last week I took a silver clay jewellery course. It was something I've wanted to try and have never done before so it seems the perfect opportunity to link to 
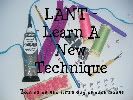
The Crafters Apprentice's Learn a New Technique (LANT) Challenge. For those of you who don't know Wendy has challenged her fellow crafters to try out new crafts they've never done before and then write about what they have learnt. If you need any ideas for crafts to try then Wendy has compiled a huge list of ideas for you!


The course I took was a four day intensive course to teach how to work with metal clay with the aim of coming away having made at least one piece of jewellery each day. There are various different types of precious metal clays but we just used silver. The silver clay is a combination of water, binders and very fine particles of silver. This can be moulded into whatever shape is required and then fired. When it is fired the binders burn away and you are left with a solid piece of metal that is 99.9% pure silver. The first time you see this happen it seems like magic! Or alchemy! I wish I had taken more pictures of the whole process but I was enjoying myself so much I forgot.

We were given three sorts of silver clay to work with - packets of silver clay (similar to polymer clay or fimo), a little bottle of silver clay paste which could be painted onto things with a brush and a syringe preloaded with silver clay for piping.

The first thing we made was a pendant with the metal clay. After playing around with polymer clay to work out a design it was time to use the real thing! We only had 7g packets to work with and the metal clay is quite expensive so it is important not to waste anything. The clay itself is funny stuff - very sticky so you have to constantly put olive oil on your fingers to stop it sticking to you and it dries out very quickly so it is best to work fast. The best thing about the silver clay is that until it has been fired you can keep reworking it - if you make something and you don't like it you can add some water to it, work it for a bit and it becomes clay again. This is excellent for people like me who have a tendency to make lots of mistakes!

This is the first pendant I made:


The texture was added using a rubber stamp with the texture imprinted on it and the circle was cut using a small cookie cutter. It was curved slightly over a domed mould to give it that convex shape and a clay bail was stuck to the back. After the clay was dry we fired it with a small creme brulee torch. It was then polished and stained using liver of sulphur to give the darker look in the crevices.

After that I was away. The next thing we made was a ring, this was using another 7g packet of metal clay and I decided to use a small stone in mine. It is a cubic zirconia - apparently you have to be careful about which stones to use as not all of them can withstand the heat, diamonds are fine but a little pricey for my second piece!! This is it:

Making a ring is a little tricky because you have to allow for the 10% shrinkage of the metal clay when it is fired. Even though I did this you can see that this ring is a little bit small which is a shame. Although I think it will fit in winter when it is a little colder and my fingers are less swollen!

The next thing we made were 3D "cage" pendants which was brilliant. And I actually remembered to take a few step by step pictures of this one so here is what we did:

Step 1: We made the shape of the pendant in cork clay. I chose a teardrop shape for mine and hid a little cubic zirconia crystal in my cork clay so that it would be in the middle of my pendant. We added a fine silver loop to the top (this is where the pendant will hang from). The cork clay was thoroughly dried and then sanded down to ensure it is exactly the right shape. I ended up with this:

Step 2: Using the syringe loaded with metal clay we piped a pattern all over the cork clay. We made sure we paid special attention to the top loop to ensure it was secure and that the loops of metal clay overlapped and were close together so there would be no holes where the crystal could fall out. At this stage it looked like this:

Step 3: We let the clay dry thoroughly (it has to be completely dry before it is fired). We did this using a hairdryer and a hotplate. After that the pendant is fired in a kiln. During firing the cork clay is burned away and you are left with a hollow shape. When it first comes out of the kiln the silver looks white but after some polishing, ta-dah:

It is difficult to see from the picture but the crystal that I put inside the cork clay is still inside the pendant and gives it a bit of sparkle as it catches the light as well as making a cute little tinkling sound. I really love this piece.

Phew! This post it getting a bit long - not long to go now I promise!

The last day of the course we were told to bring in a leaf to use to make a pendant. We spent the morning painting this with lots of thin layers of silver clay paste, allowing it to dry thoroughly between each coat. When the paste was thick enough to make a strong pendant we fired our leaves. During the firing process the leaves burned away and we were left with something like this:

Cool, eh?

During the course there was the opportunity to buy more supplies and there was time to work on other pieces here and there. In the end I made another couple of rings and a small piece including a bit of glass to test whether this would work. Not a bad haul for four days work:

I really enjoyed this course and would definitely recommend it to anyone who was thinking about having a go at using silver clay. I was amazed by how professional looking the results were after only a few hours of practice. I am also really excited by the idea that I will be able to make things at home now with very few materials. The one downside is that the silver clay itself is quite expensive but I think this is more than offset by the lack of expensive tools needed and the speed with which you can make things.

I'm really looking forward to having a go at making more things! I know what everyone in my family is getting for Christmas this year....!

Dotty xx

PS. Sorry this is such a long post - there was just so much to say. Congratulations if you made it this far!!
 
design by suckmylolly.com